Showing posts with label silhouette cameo cutter. Show all posts

Friday, November 16, 2012

Table Makeover

I purchased this little beauty at our local Antique Dealer,  Antiques on 48.


Isn't she cute!  She's going to be Stunning! Can't you just hear Bruno from Dancing with the Stars ... Stunning!  Actually she has the Leg of a dancer, too bad she only has one.


I broke out the van Gogh Chalk Paint in Chivalry, Chalk and Mama's Boy.
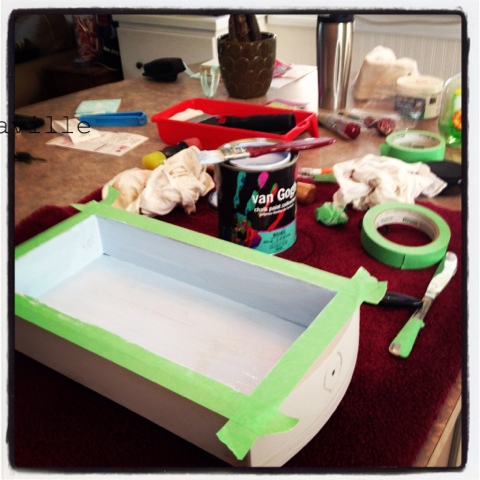

Here is the drawer painted with Chivalry and Mama's Boy on the inside for a little POP of colour.
I painted the drawer on our kitchen island while listening to Sophia Lauren and Cary Grant in the movie Houseboat, every once and a while I would watch a little of it.

 Here she is painted and the base and apron have been distressed, she's smooth as buttah!
Oh btw, every time I work on this table I think of Sophia Lauren so I'm calling her Sophia.
I designed a french graphic using my Silhouette Design software, then cut it in vinyl using my Silhouette Cameo.
Here is the top of the table prior to distressing with the graphic painted in Mascara and Chivalry.
I added a silver glaze (moon glaze) to the base and Apron to give it a luminous glow.
This glaze is part of the soon to be released van Gogh furniture make-up.
Here she is all finished, I'd like to introduce Miss Sophia!

I'd like to thank my studio assistant for being a good girl and not coming into the studio until Miss Sophia was complete.
Cookies for Miss Molly Brown!

sharing this at

Thursday, October 4, 2012

Quick 2 sided sign for mantle shelf


I had a scrap piece of wood that would be perfect for a small sign.  I measured it, then gave it a base coat of van Gogh Chalk paint in Buttah.


While the Buttah (I love that name!) was drying, I went into my Silhouette Studio and started designing what I wanted to put on this piece.  I have so many signs with words and sayings and honestly I could have them all over the house but I wanted a graphic option on this one.  I decided on a couple of birds sitting on a tree branch.  

Once the Buttah dried, I put the painted wood piece on the shelf and felt the yellow might be a little too bright for what I wanted so I put a coat of Muse over it.  Muse would pick up the warmer tones in the faux brick on this wall.  Meanwhile the conversation in my head was bouncing back and forth between a graphic image and a saying (I have SO many sayings I want to paint).  Then a light bulb went on!  Yep, I still have it!  Why not paint something on each side and I can turn it around a show the side I feel like seeing on any given day.  Cool huh?


So, I cut out the saying Believe in yourself and the Birds on a branch image, weeded them, applied the transfer tape and applied the first one to the painted wood.  Once on the wood I stenciled them with the Starry Night.


Then I let the paint dry slightly before peeling back the vinyl stencil

 Once completely dry I applied the van Gogh clear wax ... OMG this wax is heaven!  It smells like honey and had me craving toast with Buttah and Honey! 

I waited til the next morning and applied some dark wax, rubbed it in and called it a day!

Here are the finished signs up on the shelf


I haven't been to any party link ups in a while so I think it's about time, don't you.
I'll update my list as I link!

Hugs,

JoJo

Monday, June 18, 2012

Bed and Breakfast Sign Knock Off

I pinned this sign recently, I loved it and knew I had to make one!


This past weekend I was going on a Ladies Weekend to a friend's cottage and had been trying to decide what I would take as a hostess gift.  (insert light bulb turning on here) This sign would be perfect!!!
So I set out to start designing my version of this using Silhouette Studio.

This is a screen capture which shows how the type fits into the shape I was working with.  I had cut out half of the sign outline and traced it onto press board.  Frank used the Jigsaw and cut out the shape for me, he also sanded the edges for me.  When I cut the lettering out I left the sign outline so I would have a guideline for lining up on the wood.


In the meantime, I painted the board out in black, then gave it a coat of watered down elmers glue so the next layer would crackle.


I painted over the black with Annie Sloan Chalk Paint Old White, let it dry so it would crack.  When the paint was still a little damp I scraped some areas for heavy distressing, then sanded the whole sign and focusing on the edges.

One of the best things I have learned for script fonts especially is using good quality vinyl for my stencils and the right cut setting is key to fast weeding of the vinyl.  I also like using a dark vinyl so I can see the weeded letters better.
I forgot to take a picture while painting.  Here is the painted sign propped up outside so I can varnish.  Boy do I need a studio space!


Here is the final sign hanging in it's new home!

I'm linking to
 and