Showing posts with label chalk paint. Show all posts

Monday, February 18, 2013

Artwork with van Gogh Furniture Make-up

Whenever I want to try a new colour combination on a piece of furniture I like to test it first.  Just before I started work on a recent Test board Frank suggested that I make it a piece of art that could potentially accessorize the sideboard we were about to paint.  Brilliant!  I had been working on some new stencil art based on an image transfer from the Graphics Fairy, so I decided to test it on this piece.  Do you love the Graphics Fairy as much as I do?

I painted a Restore cabinet door in Balsamic first, once it was dry I placed my stencil.  For this stencil I used a sticky back 8.5 mil Ultra Mask material.

Here is the cabinet with the embossing plaster in place, now it's time to let it dry.  This is a large area so it took about 3 hours for the plaster to dry.

After the plaster dried I gave it a coat of Revenge (black)

Once the Revenge dried I gave the piece a coat of Muddaritaville's studio colour "Sangria"  it's a burgundy red.  I love the translucent quality of this.  I left this overnight to dry.

I then gave the piece a coat of Cashmere (which I later changed to Muse but I didn't photograph those steps)  Isn't it funny when you go through a stage of not liking your results you stop taking pictures.  Oh well, not to worry, we got it back on track!

Here is the final reveal, with Muse as the top coat of paint, then distressed and waxed.

Isn't it fun?!  My passion is in working on pieces like this.

Thanks for stopping by!

Thursday, January 17, 2013

Kona Coffee Sack Table ...

I saw Donna was having a Grain Sack party and I had to join in!  Grain Sacks were my inspiration for this piece.

We purchased this coffee table just after moving into our house 2.5 years ago.  It was a Kijiji deal from the same seller we purchased our Ektorp sofas from, the coffee table and matching end table were $40. The are really sturdy and REALLY ugly!  I've been threatening to paint them since Day 1 but my vision for them kept changing.  


Here she is ... So Pretty, ummm nope, but useful yes!

I started by giving the table a really good clean.  The table has a checkboard wood pattern on the top and I wanted to minimize that from showing through so I decided to sand the surface.  Then I turned the table on it's side and painted the sides and legs with van Gogh Chalk paint (vGCP) in Bole.

 Once the base was dry I let it sit for ummm 2 weeks.  Yep!  Every day I got more and more frustrated with the lack of space in our laundry room, aka The Studio.  Ahhh! are you freakin kidding me.  Note in the picture above right side is our dryer, I have about 10" between the dryer and the edge of the table.  Anyway after Christmas I finally got my S*!t together and decided to paint the top.  First I gave it a coat of vGCP in Cashmere, once that was dry I rolled on Serenity one strip at a time.
While the Serenity was still wet I dragged a Kitchen Scrubby through the paint to create a look of a burlap sack.

Next I created a stencil for the stripes, I'm too impatient to tape out the lines.  I taped a guide line on the  table so I didn't end up with lines that weren't straight (I do not trust myself to be accurate).

Once the stripes were complete I felt the burlap sack effect was not strong enough, so I took out the RL Linen effect brush and dry brushed the base paint Cashmere over Serenity in a cross hatch pattern.  That's better!

Next I added a Kona Coffee Logo, I created a stencil for this too.
Do you see my mistake here?  I didn't notice it until I was waxing the table.  Once the stencil was dry I lightly distressed the stencilled areas and table top.

Now can you see the mistake?  When I weeded my stencil I didn't remove the period after the U so I had to realign the stencil and fix it.


All Fixed!

My original intention was to wax the base and use Table Top finish on the top where the daily use happens.  Do you do anything different when finishing pieces the you are selling compared to those you plan on keeping?  We have a new puppy so we don't really put much on the table right now, well other then our feet now& then.  I love the wax finish so I decided to wax the top of the table.  I used both clear and dark wax.


Here is a shot of the top of the table, I still need to add more wax but I ran out!  Yep, this wax is so great I sold out, and I'm OK with that.


I'll leave you with this final image of Molly inspecting the room.


I'm partying over at Funky Junk this week!


Friday, November 16, 2012

Table Makeover

I purchased this little beauty at our local Antique Dealer,  Antiques on 48.


Isn't she cute!  She's going to be Stunning! Can't you just hear Bruno from Dancing with the Stars ... Stunning!  Actually she has the Leg of a dancer, too bad she only has one.


I broke out the van Gogh Chalk Paint in Chivalry, Chalk and Mama's Boy.


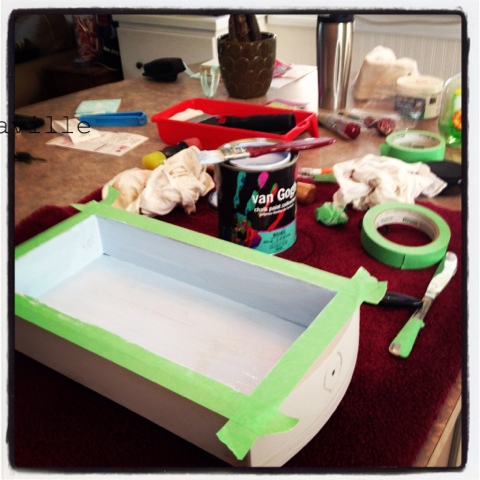
Here is the drawer painted with Chivalry and Mama's Boy on the inside for a little POP of colour.
I painted the drawer on our kitchen island while listening to Sophia Lauren and Cary Grant in the movie Houseboat, every once and a while I would watch a little of it.

 Here she is painted and the base and apron have been distressed, she's smooth as buttah!
Oh btw, every time I work on this table I think of Sophia Lauren so I'm calling her Sophia.
I designed a french graphic using my Silhouette Design software, then cut it in vinyl using my Silhouette Cameo.
Here is the top of the table prior to distressing with the graphic painted in Mascara and Chivalry.
I added a silver glaze (moon glaze) to the base and Apron to give it a luminous glow.
This glaze is part of the soon to be released van Gogh furniture make-up.
Here she is all finished, I'd like to introduce Miss Sophia!

I'd like to thank my studio assistant for being a good girl and not coming into the studio until Miss Sophia was complete.
Cookies for Miss Molly Brown!

sharing this at