Sunday, December 19, 2010

The end is in sight ...

We have almost finished our current projects, and it's so exciting to start seeing the end result.  It's kinda like our Christmas present to ourselves.  It's really beginning to feel cozy.  On my last update I asked for opinions on hats or no hats for our kitchen chandelier, I took your guidance and picked up some hats for the chandi!

So to recap, here is the original light ... Fancy Boob Light ... Yep, found a pic!  I think I will take this baby to Restore, someone will like it (won't they?)


Here's the new Chandi prior to party hats


And here she is all decked out ...

Thank you everyone who commented, not only does it look good, it casts a much nicer light with the shades.

Also on my last post I gave you a preview of our faux brick, Frank had applied drywall mud to the wall to create the bricks.  This weekend I tackled the bulk of the paint job,  I'm going to give it a break over the holidays then add a little more detail later.

Right now there are presents to wrap, family to visit, eggnog to drink and turkey to be eaten.

To recap here's the before


 During ...


After


Thanks for stopping by!

Jo

Linking to

Wednesday, December 15, 2010

Progress Update, and I'd love your opinion ...

Our home is open concept so it's hard to take pictures of updates when we are working on both the kitchen and living room.  Frank has been busy working away while I'm at the office, we're almost there!
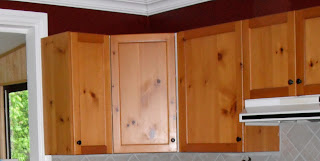
Here is a quick peak at the Distressed Kitchen Cabinets, I will apply a coat of Minwax poly to the finished cabinets.


Next, Frank has been working on the faux brick.  I have not been able to capture any action shots since I have been at the office while he's creating.  He is applying drywall compound to the walls then carving out the brick, these are not perfectly straight bricks, we wanted something that was going to look more rustic and old.  Here is the wall with the drywall compound applied ...

Painting of the brick and shelf are on the agenda for this weekend.
Here is the shot of the fireplace and the wall.

It will be so different once the painting is complete, here is the before again

Here's where I need your opinion, last week I mentioned a deal I got on the Home Depot website for a chandelier.  We put it up on the weekend, it's smaller then we imagined but we are OK with it for now. (It's so much better then the Boob light).  Here is a pic.

 I just realized I never got a picture of the Boob light while it was up, I have to get a shot of it before it goes to it's new home ... where ever that may be.  It's actually a Nice Boob light as far as they go, just not my preference.  So my question is .... Shades or No Shades?  I took a shot with one blue toile shade on it, I'm just wondering if the light is too small for shades.

I look forward to hearing your thoughts.

Jo

Saturday, December 11, 2010

Christmas Treats and Traditions

What I love most about Christmas is gathering with friends and family.  A festive gathering is not complete without the wonderful food prepared with love.  My sister-in-law Cyndy bakes some of the best Christmas treats.  There was one chocolate goody that I think was called a Buried Cherry (chocolate covered cherries).  Imagine a group of adults sitting around the table after dinner, some wine had been consumed and we were now enjoying our coffee and treats, there had to be 3 or 4 conversations going on, I asked Cyndy what the name of the treat was I was eating but I couldn't hear her answer with all the conversation ... long story short this treat ended up being nicknamed Halle Berry Buried Cherries by the end of the night (I guess you had to be there).

Best of all are the family recipes and traditions that get passed down.  My Stepmother Norma is of Polish heritage and cabbage rolls are served with Christmas Dinner, it's not Christmas Dinner without cabbage rolls!  Also, sausage meat in the stuffing is a must for me.  It was a favorite of my Dad's too, I think it may have been the only recipe he ever asked my Stepmother to change ... he had to have sausage in his stuffing.  I've known families who put bacon slices on their turkey breast while it's cooking and everyone would fight over the bacon slices when the turkey is ready.

I've only cooked Christmas dinner a few times, Frank and I enjoy our Christmas dinners at Norma's or my sister Kim's house.  I bring the potatoes ... it may not be gourmet but at least the dinner hostess doesn't get stuck peeling potatoes on top of everything else.

Here is one quick little Christmas sweet that I whip up almost every year, it's fairly common, it's White Chocolate Almond Cranberry Bark.  It's soooo simple.

16oz White Chocolate Chips (2 packages)
3.5 oz sliced Almonds
1 cup dried Cranberries

Ingredients

Chop Almonds

Place Almonds in Skillet and Toast, this can be done in the Oven too (I just forget them sometimes in the oven and burn them ... Stinky!)
Put White Chocolate Chips in Bowl and microwave for 2 minutes at half power

Continue to toast almonds, remember don't burn them!

Take Chocolate out of microwave and stir

Add Cranberries and Stir


Add Almonds in and Stir

Spread Mixture thinly on parchment lined cookie tray then put in the fridge to harden

Break into bit size pieces

Taaa Daa!  See, isn't that easy!  Yummy Too
I'm linking to Funky Junk Interiors SNS #60


Thursday, December 9, 2010

It's a White Christmas this Year!

We've gone White this year!

We wanted a smaller tree that would fit on a corner table in the Living Room, with all the painting and decor changes we are making right now we thought a white tree would look really great.

Here's a shot that Frankie took during the day today with his Blackberry ...


I took a couple of quick pics this evening but I haven't mastered the camera settings yet


The room is a bit of a mess, Frank is working on the faux brick and I still have to finish off the kitchen so I will post a shot later to give the whole effect of the tree in the room.

Here's a close up. Hmmm, I better go back and read Donna at Funky Junks Photo tutorial.  Can you believe I work at a Photo Studio?  No I don't take the pictures, that's evident in my photos.

I'm happy with the tree but I think it will need some tweaking next year, I may have rushed the decorating a little.  As Frank says the tree's hips are out of alignment, I didn't do a very good job of "fluffing" the tree before decorating.

I'm linking to the Holiday Home Party at Thrifty Decor Chick!


And


Thursday, December 2, 2010

Toner applied to the Upper Cabinets

Just a quick update tonight to show you the toner on the Upper Cabinets.
It's coming together!
I ordered a chandelier from Home Depot online to go over the island.  It was half price. I love a deal!
Even better, we be able to get rid of the "Boob" light in the kitchen.

Monday, November 29, 2010

The Makeover Continues ...

I have completely neglected blogging lately, mostly due to the fact that none of our projects are complete yet.  Wow, what a roller coaster ride!  It's amazing how each colour decision affects the next.

As per my last post we started off priming the whole living room and kitchen.  The initial plan was to paint both rooms Behr Butter Cookie yellow but last minute we wondered how a nice fresh light blue might look (Ok, it was after Frank watched a show on HGTV and saw a great paint colour in a room that had similar window light and trim as our rooms)  So, he called me at work we discussed it and I picked up some sample pots of paint on my way home.  Here are the samples on the wall:

Yuk!  the yellow isn't working and the blue is looking too grey.
Luckily Frank recorded the show with the blue paint he liked so we watched it together.  We actually paused the show on screen for over an hour while we discussed our paint selection.  Then we were off to HD to purchase Wave Crest ...

Ok, so we have our blue!  Above just shows one coat of Wave Crest around the window.  Of course, every trip to HD & each decorating show we watch the decor plan gets "tweaked", we had a brief lapse while at HD and were going to use a brick wallpaper behind the gas stove in the LR so we had multiple samples of wallpaper hanging up behind the stove ... can you say "head spinning!"
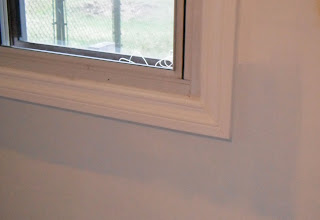
Now, on to painting the kitchen cabinets, white.  After our weekend of painting the dog woke me in the middle of the night to go out, our living room is this beautiful light blue as is our kitchen and the kitchen cabinets had a very light coat of white on them and it was a full moon ... OMG!  It's so white in here!  It does not look right.  What now?  Well I asked Frank what he thought of the colours and he was undecided.  HGTV was calling him once again!  So while I was at work he called me with a new blue for just the kitchen walls and I picked it up on the way home.  Tuesday Frank and his friend Eric repaint the kitchen walls while I'm at work ... what a joy to come home to.  That's better! (sorry no photo yet)
Flip forward to this Saturday, I put Martha Stewart beadboard wallpaper up on one wall of the kitchen and now it feels like things are coming together.  We still aren't loving the kitchen cabinets, the White looks like chalk, we aren't sold.  Soooo, out come the swatch books and we look at the little inspiration piece from Behr that has our 2 blue wall colours in and there is a really creamy white called Swiss Coffee, I like coffee! Yep, that's what it needs!  Here is a one coat reveal of the Swiss Coffee with the new blue in the kitchen ...

This is just one coat and we are still considering some aging toner around the edges, of course the doors look much better when the knobs are on too.
Here's another look at the before (just for you KA) ...
What do you think so far?

Thursday, November 18, 2010

We've finally started the painting!

Boy life gets the in way when you have a long list of DIY's!
Well I'm excited to say that the work started at our house yesterday and the best part is I was at work while it was happening.  How cool is it to start checking things off the list when you don't even have to lift a finger (except for picking up the Subs to feed the boys at the end of their busy day)

Here's a quick preview

Wood Stove shiny burgundy wall - Before

Here is the wall primed! Ahhh, can you say relief.  We will be doing a faux stone treatment behind the stove ... full details on that project will be posted when complete (or during if I get impatient)

Kitchen burgundy Before, well at least this pic is kind of neat since this is the day we took possession of the house.

And here's the kitchen primed, yep it's messy but it's so much brighter!  The end wall colour is going to be a butter cookie yellow, I hope to get the cabinets painted and distressed this weekend.  I'm so excited! 

Stay tuned!  Lots more pics to share as the weekend progresses.

** I do want to add that I hope to get better pics as we progress, I rushed with all of these pics and clearly time of day and camera settings are different from Before to After which doesn't tell the best transformation story ... I aim to do better with that as we complete the project.


Saturday, November 6, 2010

My attempt using the natural elements ...

 WARNING:  I am sharing my failure with the hopes that some of you will share how you overcome the challenge I faced.

I am inspired by the many postings at Funky Junk Interiors SNS#55.  I have not done much decorating with natural elements - twigs, pine cones etc..  Well,  I have used Pine Cones when I was a condo owner but I purchased them from a Christmas Store, they were cinnamon scented so they were a nice Christmas addition.

Let me show you my inspiration for this week ...

I found this image and inspiration at Libby Langdon's site 

I love the natural feel, and I thought it would be a great seasonal transition piece, I was considering adding sea salt (for snow) as we moved closer to Christmas.  So Wednesday night I rushed home to start my project, I had to put this together Wednesday night because I was going to stay at friend's for a week

Diversion ... I am typing this from their sofa now while one of their dogs tries to get my attention scratching on the patio door, there he's back in now, now dog #2 is scratching, Dog #2 is in and she is staring me down and wants my spot on the sofa, Alrighty now we're settled, me and 2 Golden Retrievers on a sofa and my toes are being licked, I can't concentrate, should I go get some socks?

Where was I?  Pine Cones and Twigs!  I rushed home Wednesday night and ran out to the yard to clip some twigs off of trees and collect pine cones.  I decided I wanted my arrangement to look a little more rustic so instead of ribbon I used twine.  So, here we go I assembled the materials
The Vase,  challenge number 1, the vase base is narrow and my pine cones are huge!  But hey, I'm shopping the house for this arrangement.  Ok, no avoiding this here is as far as I got with this arrangement ...

I got to this point and I was straightening the twine and a couple of little spiders started to surface, then a little worm eeeccckkkk!  I quickly picked it up and ran outside with it and gave up!  Can you see the bundle of candles on the left side of this image, I was going to use them since I wanted white candles, Frank pointed out that they looked like a bundle of dynamite, at this point I wish it was dynamite cus I would blow this DIY up!  Why am I posting this?  I'm new to "crafting off the land" please share with me ... is there something I should be spraying these items with before I use them so I will not encounter invaders?

I can't leave you without sharing my Guest Bloggers for the evening ...

Chance and Ruby


I'm linking to Funky Junk Interiors SNS (for advice)


Funky Junk's Sat Nite Special

Wednesday, November 3, 2010

"To Do" List .... Not yet worthy of the Gitter Done over at Funky Junk Interiors

The golf course is closed for the season and Frank is finally enjoying a few days off.
He loves his work but during golf season he has one day off a week - that just isn't enough time to get into a DIY project. So with a few extra days off this week he organized and rearranged the furniture in the office. It's looking good. I think he'd get upset if I took a picture right now because he hates the lime green walls. There is a lot less furniture in that small room now, and more items to sell on Kijiji.  Time to trade the modern frosted glass desk for rustic distressed pieces with a story to tell.

Anyhoo, I'm going to be away from home for a week so who knows what might be done by the time I get home ... walls primed and ready for Butter Cookie Yellow paint? Perhaps the faux brick/stone may be sculpted on the fireplace wall and ready for me to paint.

Here's a little preview of the area the brick will be going ...


We will be so happy to see the shiny burgundy paint gone.  It runs behind the Gas Stove and into the kitchen.  Frank is looking forward to slapping the drywall mud up and sculpting it into rustic aged bricks.  We did a similar project 6 years ago on our kitchen back splash.  Here's how that turned out ....


Stay tuned for the final results, it would be nice to have a stone wall and mantle to adorn with Christmas decor!

Sunday, October 31, 2010

My First Link Up!

I have been so inspired by the many blogs I am following.  Til now I have been a spectator and have not participated in any link ups or contests but this weekend I said "Gosh darn! I'm going to get involved".  I improvised with items I had available so I'll show you how I turned this ...


Funky Junk's Sat Nite Special


Into this ...


I started with a mirror that I have had for years, I've tried to sell this mirror in garage sales but I have moved it 4 times!  Somehow it even survived my goodwill donations, so it was time to Use it or Lose it!  I painted out the mirror with Caromal Colours Paint,  this textured paint sticks to almost anything.  My first coat was in Colonial Blue ...

As impatient as I am I was able to leave this to dry over night.  While this was drying I used some Omni Gel to transfer an image to use on this sign.  I was inspired by some art that Miss Mustard Seed used for one of her hand painted signs so I created something close to that ...

I started coating my copy with Omni Gel, as I mentioned I used what I already had, I wish I had professional sign equipment like Donna at Funky Junk or even a Cricut so I could create a stencil so I could paint the sign instead.  I don't care for the glossy textured finish that the Omni Gel has. 
This morning I gave the mirror a coat of white paint and started soak my image transfer to remove the paper.


Next I used the omni gel to add the expression to my painted mirror

Once the gel dryed, I applied some aging gel, sanded back the paint to distress.  You will notice the shine in the image above.  I don't like the shine so adding paint and sanding back helped to remove this finish.  I completed the job with a coat of wax and a string to hang ... Whala!


Thank you to all the wonderfully talented women who inspire me by sharing their projects and how to's on their blogs!