Showing posts with label diy. Show all posts

Sunday, February 26, 2012

Coca-Cola End Table

I threw this together with a few things we had around the house

Isn't she cute?

This project started when I was deciding where to store the metal tub that I'd purchased to put our Christmas Tree in.

I had this piece of glass on an old wobbly table that I put outside on the deck.  The base is garbage but I just couldn't bring myself to throw both the base and glass out.


I cleaned the glass and checked it on the top of the of the tub to see the fit and make sure it wasn't  going to wobble ... I hate glass that wobbles!

Here's the tub prior to adding the logo.

I found a Coco-Cola Logo online and imported into my Silhouette Design software.
Then I cut a stencil with my Silhouette Cameo (I love my Silhouette!).

I just used some white acrylic craft paint to paint out the logo.

The table needed to be higher, we were going to add legs but in my haste to get something finished I started hunting around the house and found an aged metal tray with legs that I could never find a good use for.  I added a cut up 2 x 4 on top of the tray to lift the tub just a hint more.  Done!

Posting to


Home Stories A to Z


Saturday, January 8, 2011

Kitchen Storage solution ...

First, let me tell you how excited I am that our kitchen is almost complete.  Yippee!  We just have to complete the Island trim and paint it, oh and there's one wall that has been patched so it needs paint.  Then DONE!  Finito! Wooo Hooo!

I was off work this past week and had a mission to check a few things off the to do list.  I don't know what it is but if I don't stay busy with small projects I'll nap the day away.  Then I'd be all grumpy when I go back to work if I hadn't accomplished anything.  But, hey, that's not the case so all is good!

OK, now that my self analysis is over, back to our Kitchen Storage solution.  For the last 10 years I have had a Hanging Pot Rack for easy access to cookware.  When we moved to our new house in June we knew the Pot Rack would be too large for this house so we gave it to a friend.  The Pot Rack looked something like this one ...

We have been here 7 months and both Frank and I have hated wrestling with pots in the cupboard so we had to do something.  I suggested some sort of Wall Pot Rack. Usually at this point I need to give Frank a visual so he knows what I am thinking.   I didn't want too spend much, so the plan was to go to Ikea and pick up this Grundtal wall shelf with some S hooks, maybe one of those hanging pot thingies too.

I was procrastinating, I did not feel like packing a lunch for the road trip to Ikea, I did some searching online to see if there was another solution that I could pick up from a local store.   While I was doing this, Frank came up with a brilliant idea to use a shelf I had originally bought to use as a mantle.
We had the darker of the 3 shelves shown above but it wasn't rustic enough so I painted and distressed it, then went to the local hardware store and picked up some hooks for $2.78.  Porter, an American Labrador Retriever helped me find the right hooks (next time I'll take a pic of him, he has the best face)
and there you have it ... One Beautiful and functional pot rack!  No more clanging pots at dinner time!
Taaa Daaa!

I'm going to link up with Donna and everyone over at Funky Junk Saturday Nite Special #77


Monday, November 29, 2010

The Makeover Continues ...

I have completely neglected blogging lately, mostly due to the fact that none of our projects are complete yet.  Wow, what a roller coaster ride!  It's amazing how each colour decision affects the next.

As per my last post we started off priming the whole living room and kitchen.  The initial plan was to paint both rooms Behr Butter Cookie yellow but last minute we wondered how a nice fresh light blue might look (Ok, it was after Frank watched a show on HGTV and saw a great paint colour in a room that had similar window light and trim as our rooms)  So, he called me at work we discussed it and I picked up some sample pots of paint on my way home.  Here are the samples on the wall:

Yuk!  the yellow isn't working and the blue is looking too grey.
Luckily Frank recorded the show with the blue paint he liked so we watched it together.  We actually paused the show on screen for over an hour while we discussed our paint selection.  Then we were off to HD to purchase Wave Crest ...

Ok, so we have our blue!  Above just shows one coat of Wave Crest around the window.  Of course, every trip to HD & each decorating show we watch the decor plan gets "tweaked", we had a brief lapse while at HD and were going to use a brick wallpaper behind the gas stove in the LR so we had multiple samples of wallpaper hanging up behind the stove ... can you say "head spinning!"
Now, on to painting the kitchen cabinets, white.  After our weekend of painting the dog woke me in the middle of the night to go out, our living room is this beautiful light blue as is our kitchen and the kitchen cabinets had a very light coat of white on them and it was a full moon ... OMG!  It's so white in here!  It does not look right.  What now?  Well I asked Frank what he thought of the colours and he was undecided.  HGTV was calling him once again!  So while I was at work he called me with a new blue for just the kitchen walls and I picked it up on the way home.  Tuesday Frank and his friend Eric repaint the kitchen walls while I'm at work ... what a joy to come home to.  That's better! (sorry no photo yet)
Flip forward to this Saturday, I put Martha Stewart beadboard wallpaper up on one wall of the kitchen and now it feels like things are coming together.  We still aren't loving the kitchen cabinets, the White looks like chalk, we aren't sold.  Soooo, out come the swatch books and we look at the little inspiration piece from Behr that has our 2 blue wall colours in and there is a really creamy white called Swiss Coffee, I like coffee! Yep, that's what it needs!  Here is a one coat reveal of the Swiss Coffee with the new blue in the kitchen ...

This is just one coat and we are still considering some aging toner around the edges, of course the doors look much better when the knobs are on too.
Here's another look at the before (just for you KA) ...
What do you think so far?

Thursday, November 18, 2010

We've finally started the painting!

Boy life gets the in way when you have a long list of DIY's!
Well I'm excited to say that the work started at our house yesterday and the best part is I was at work while it was happening.  How cool is it to start checking things off the list when you don't even have to lift a finger (except for picking up the Subs to feed the boys at the end of their busy day)

Here's a quick preview

Wood Stove shiny burgundy wall - Before

Here is the wall primed! Ahhh, can you say relief.  We will be doing a faux stone treatment behind the stove ... full details on that project will be posted when complete (or during if I get impatient)

Kitchen burgundy Before, well at least this pic is kind of neat since this is the day we took possession of the house.

And here's the kitchen primed, yep it's messy but it's so much brighter!  The end wall colour is going to be a butter cookie yellow, I hope to get the cabinets painted and distressed this weekend.  I'm so excited! 

Stay tuned!  Lots more pics to share as the weekend progresses.

** I do want to add that I hope to get better pics as we progress, I rushed with all of these pics and clearly time of day and camera settings are different from Before to After which doesn't tell the best transformation story ... I aim to do better with that as we complete the project.


Thursday, October 14, 2010

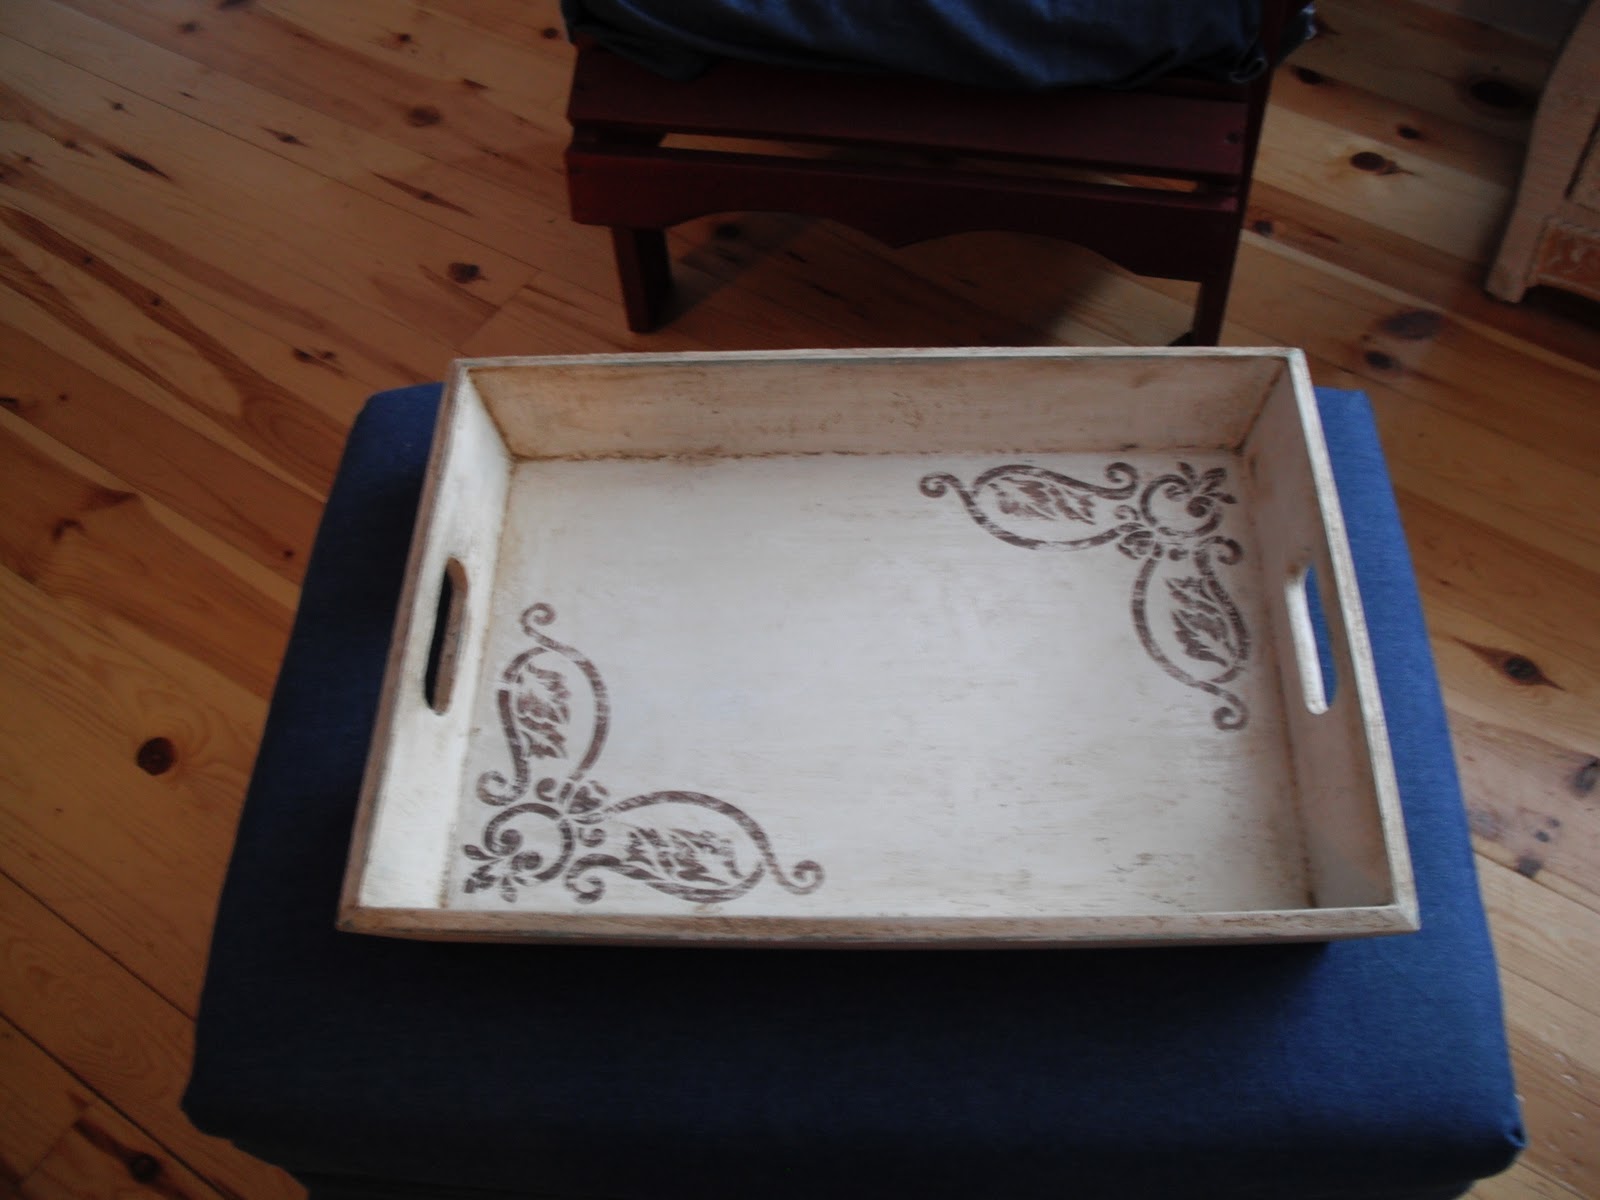
Finished Tray

It's done! I didn't put an expression on it in the end, a last minute decision.  It's true that you need to "feel" the project as you go.  So here is the before ...

It was a sage green which no longer goes with our decor so it became one of my first projects using the  amazing paint from Caromal Colours.

And here is the After ...


Here are some up close images of the finish,  Caromal Colours paint is thick and adds an aged texture to any piece you apply it to and it sticks to almost anything!  Once the paint was applied and dry I used my handy dandy sander to smooth and distress, then I applied the aging toner, for a finishing touch I stenciled a decorative accent and sanded it back to appear old and worn.  The final touch is Liberon past wax in neutral .... Whaaalaaa!  done.

Monday, September 13, 2010

Pics of a completed projects


On yesterday's post I mentioned a couple of small projects we had completed so far but I didn't have a chance to post any photos.  I should know better ... a picture's worth a 1000 words.

So here you go Annette <grin>

This is the gate out of our backyard that leads to the forest trails ... Bambi lives back there!

Just another view of the fence (the wood fence was already here when we moved in)

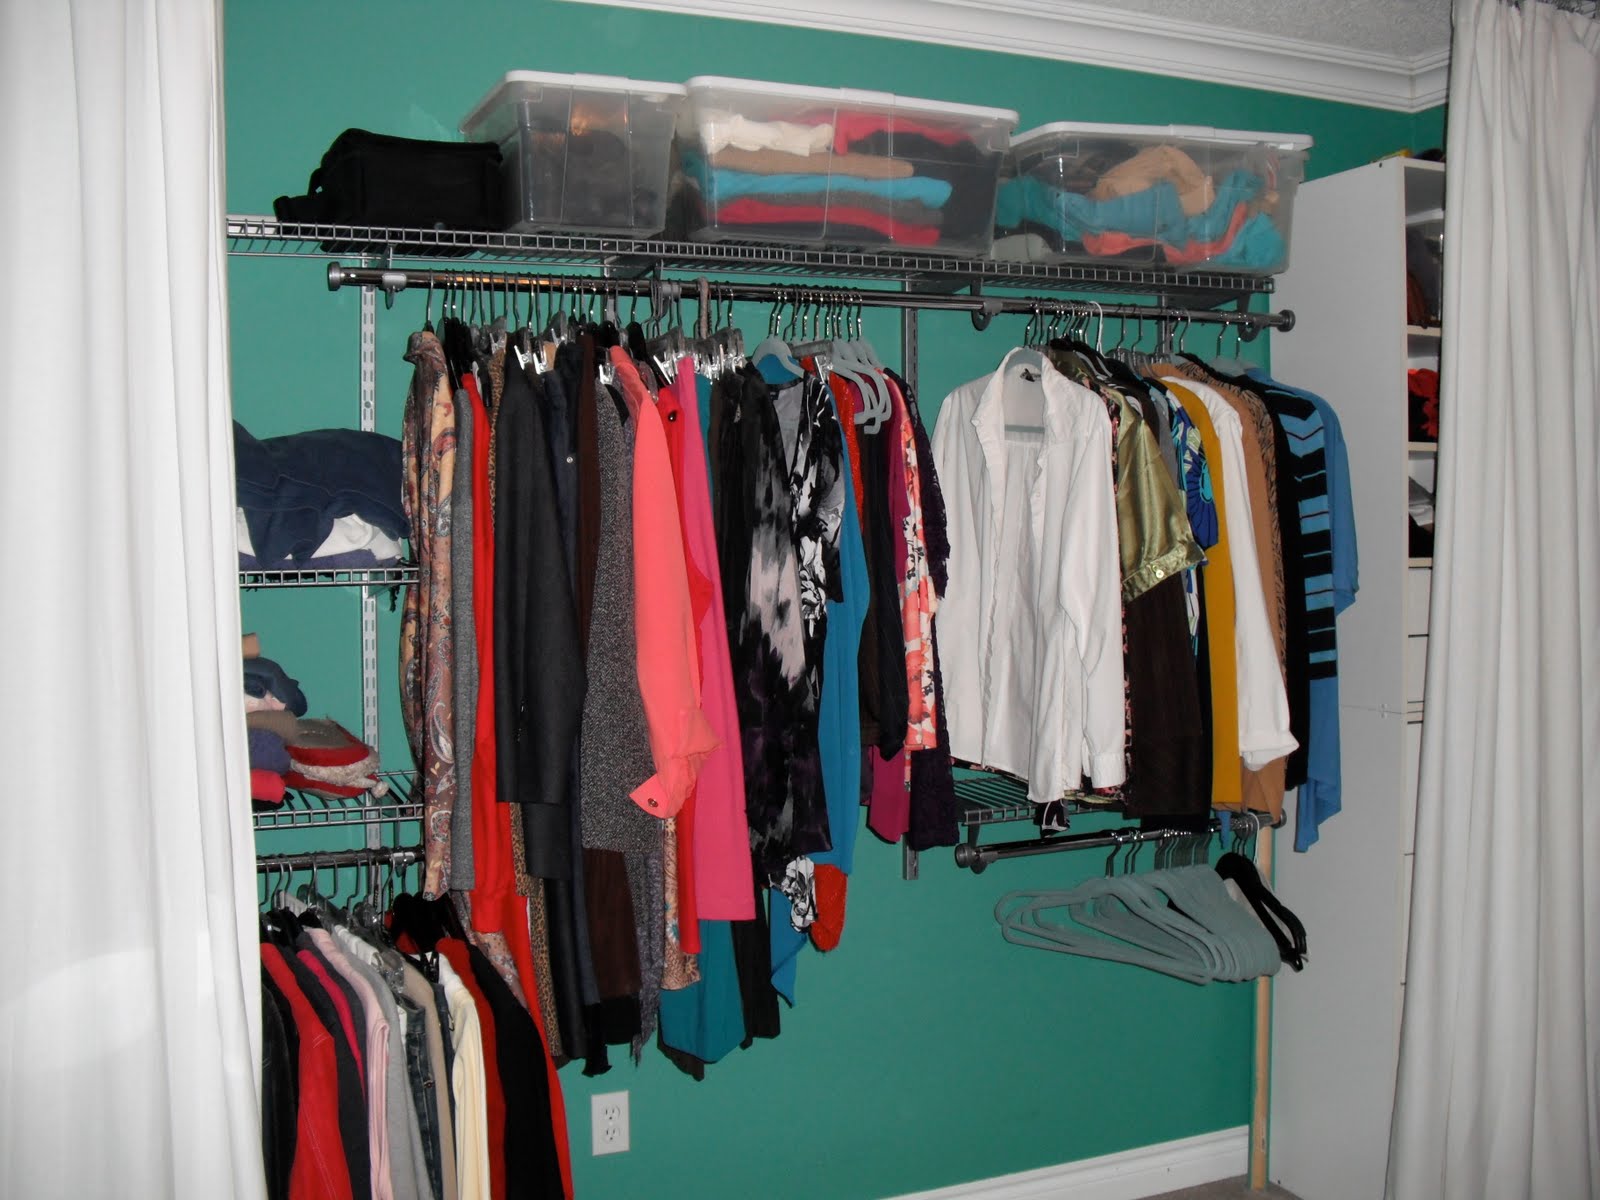
The wall colour will change (one day).  No I don't hang my clothes by colour ... is that a bad thing?

Alternate view of closet organizer.

Sunday, September 12, 2010

Lots of projects on our DIY list ...

Frank and I have been inspired by all the blogs that we have been reading lately.  One of my favs is theLetteredCottage.net.

We spent last weekend brainstorming on colours, and treatments for our livingroom/kitchen combo.  Stay tuned for some before and after pics.  I wish we just had a week that we could concentrate on completing the work but alas we need to go to work to earn the kibble.

When we first moved in there were a few things we need to take care of right away.  First was a closet, we were all over the map at first ... Ok, I was all over the map because I didn't want to spend much money until all the "move" bills came in.  It's a good thing we didn't spend too much because we were hit with a closing fee that we were not expecting.  We ended up putting up a Rubbermaid closet organizer on a wall in the master bedroom and to keep costs down we put up a Ikea kvartal ceiling track and used drapes to hide the clothes.

The second project and largest expense was a fence for Buddy.  When it comes down to it, it's all for Buddy ... the house, the yard, the fence.  We ended up with a black chain link since we were not looking for privacy just a way to keep stray Critters out and Buddy in.  I was amazed how quickly the fence went in, the crew arrived around 8am and they were gone by 3pm.  We are so happy with the way it turned out since we back on to a forest and the black fencing blends right in and does not obstruct the view of the forest.  We even had a gate installed so we have access to the forest trails from our yard.  We had a couple of other unexpected purchases which I will share in my next post.

Buddy Budman

Saturday, September 4, 2010

We are home!

Our Cottage in the Country
In June of this year we finally became home owners again.  It took us a while to find a "cottage like" home in good condition within commuting distance to Markham, Ontario (just north of Toronto).  We looked at many homes on cottage roads and even though our must have list was short, many of the homes we looked at were lacking 1 or 2 key items ... laundry, septic system, closets or storage space.  What they did have were slanting floors, holding tanks, nosy neighbors (Miss Pinky), one or two had amazing lake views but homes were too small to live in.  It started to get discouraging but in the end we found our piece of heaven 10 minutes from the lake with a 100 x 150ft lot.  Following are a couple of interior pics from the day we took possession.

Living Room
Kitchen