Sunday, August 12, 2012

2012 the Year of Change

2012 will be a year I remember forever!

I haven't posted lately and haven't worked on any projects for a while.  Come Fall I will have lots to share! I want to take the opportunity on this post to update the year so far.

The end of March we said good bye to our best friend and companion Buddy.  We've had Buddy since he was 3 years old, he was a rescue dog.  The term rescue dog is often misinterpreted, if you choose to adopt a dog from a shelter they will spend the rest of their days rescuing you
Buddy the miracle dog was diagnosed with Bladder Cancer in 2005 and we were told to take him home, make him comfortable since he only had about a month left with us.  I use to love burying my nose in the fur on his head when I hugged him, I know it sounds odd (especially to people who find dogs stinky) Bud had a perfume scent to his fur. No really, he did.  We can learn so much from our dogs, Buddy didn't know the vet said he had a month left to his life so he lived 7 years after being diagnosed.  He was good most of the time except for the occasion flare up of whatever was going on in his bladder.  If I had a dollar for every time Frank wanted to give Bud a special treat like ground beef with his dinner ... Frank would say "he's not well you know!"  haha! 


We miss you Budman, you will always be in our hearts!

Monday, June 18, 2012

Bed and Breakfast Sign Knock Off

I pinned this sign recently, I loved it and knew I had to make one!


This past weekend I was going on a Ladies Weekend to a friend's cottage and had been trying to decide what I would take as a hostess gift.  (insert light bulb turning on here) This sign would be perfect!!!
So I set out to start designing my version of this using Silhouette Studio.

This is a screen capture which shows how the type fits into the shape I was working with.  I had cut out half of the sign outline and traced it onto press board.  Frank used the Jigsaw and cut out the shape for me, he also sanded the edges for me.  When I cut the lettering out I left the sign outline so I would have a guideline for lining up on the wood.


In the meantime, I painted the board out in black, then gave it a coat of watered down elmers glue so the next layer would crackle.


I painted over the black with Annie Sloan Chalk Paint Old White, let it dry so it would crack.  When the paint was still a little damp I scraped some areas for heavy distressing, then sanded the whole sign and focusing on the edges.

One of the best things I have learned for script fonts especially is using good quality vinyl for my stencils and the right cut setting is key to fast weeding of the vinyl.  I also like using a dark vinyl so I can see the weeded letters better.
I forgot to take a picture while painting.  Here is the painted sign propped up outside so I can varnish.  Boy do I need a studio space!


Here is the final sign hanging in it's new home!

I'm linking to
 and


Saturday, June 9, 2012

It's Pallet Time!

When I saw that Funky Junk's SNS 138 was featuring Pallets and Reclaimed Wood projects I had to repost this project, it's one of my favs to date and I'm looking forward to doing more like it.  I think it was a post that Donna did a while back on how to select the right pallet for a project that started my obsession.  I'm very luck to have a good friend in the printing business and he now sets aside pallets that he thinks will work for my projects.

Here is the post on my pallet project ...


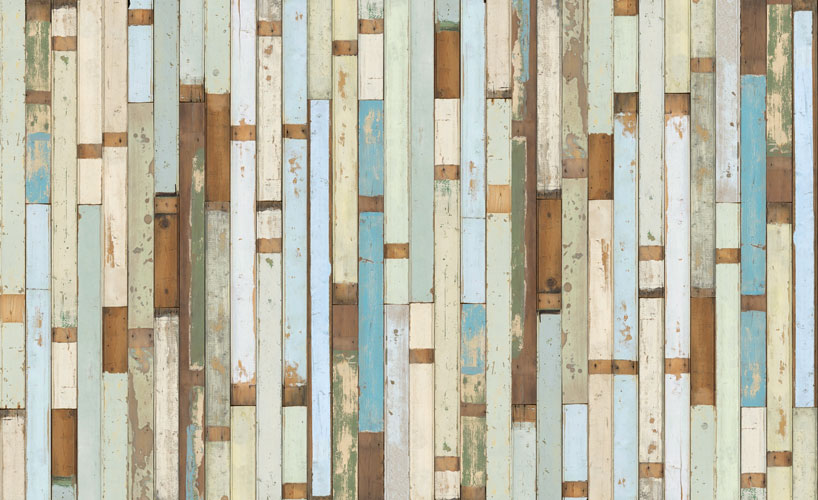
I have been obsessing over pallets and distressed wood lately.  Pinterest has just been adding fuel to the fire.  Initially I wanted to cover one complete wall in the living room with pallet boards, or Piet Hein Eek scrapwood wallpaper which is totally out of my budget!

I love this wallpaper!
Anyho, I recently asked my favourite Printer, Jim, what he does with all the Pallets that come into his building.  He told me he either returns them or trashes them ... WHAT????  They're treasure I told him, I must look at them.  So Frank came with me and the first beauty we set our eyes on was this one ...
I love her!  I must have her! 
She stayed in the back of my car for a few days, while I pondered what her future would be.
Then I received this image in an email from Joss & Main.
There's another image at their site with this clock resting against a skid/pallet and I loved the look.
I shared the image with Frank and told him I was going to make this clock and rest it against the pallet we brought home.  He said "why don't you just paint the clock right on the pallet".  Hmmmm.
OK!
Above is my "plan" for the project and our living room wall, can you visualize it?  Isn't it Cool?

So we got to work, Frank got to play with his Sawzall.
He removed the lower part of the skid for me.  While he was doing that I was prepping my masks to make the painting easier.
Here is the part 1, the background colours.

I used Annie Sloan Chalk paint as the base colours, the center is Old White and the outer section is mainly Louis Blue with some Paris Grey. I didn't go for complete coverage since I wanted the distressed look to come through.   Once the paint was down I slowly peeled back the mask.

Here she is, what do you think so far?  I do not know what I was thinking from here on as I do not have any photo's of the steps.  So next I painted the border, and numbers with black acrylic craft paint.  I used my Silhouette to cut my masks.  It was a little tricky, since I had to tile the image to get the size.
Once the painting was complete we drilled a hole in the center of the board for the clock motor to come through.  The hands are a little small but they were the best I could get without ordering online and waiting for them to arrive.  I'm on a roll and I'm not waiting baby!

This is her first reveal, we had a problem with the hands so I purchased a better set and movement from Lee Valley.   Next I painted the boards to mount the hangers and lanterns to.
Frank painted over a sign we had already to fit our colour scheme and we decided it looked so good we would put it over the clock on the sofa wall.
Today Frank put it all together on the wall, I am so happy with it.
Cool eh?

Here's an evening shot with the candles lit.

I really like the shadows these lanterns cast.
I wish I had a before photo but I hated the wall so much I didn't want any evidence.

This is the print that was on the wall, it looked lost on the wall and just did not suit our decor anymore (I'm not certain it ever really did).  I sold it on Kijiji to a nice couple who picked it up last week.  Yay!

I'll be linking to:


Wednesday, May 30, 2012

My Schoolhouse Obsession is still going strong!

Wow! What the heck have I been up to lately?  It's been over a month since I have posted.  I haven't completed many projects lately either.  I suck!  I guess I have been spending too much time obsessing on School Houses and what I want to do when I grow up (I'll post more on that later)

I have blogged about my love of Renovated Schoolhouses before,  recently my obsession has been on overdrive!  As I type this post I have started a board on Pinterest for my School House love.  If you go to that board you will find links to some of the recent Real Estate listings below.

This one is a beautiful reno north of Cookstown, it's only one bedroom though.  I fell in love with her about 3 years ago.  I keep looking to see if she comes on the market again.

Isn't she adorable!

The next one is a gorgeous restoration in Paisley Ontario and she's for sale ...


Here is the link for this great place http://paisleyschoolhouse.ca/
The owner lovingly restored her. She put in some amazing Barndoors.

We recently went to look at this School in the Haliburton area.  Yep, the bell still works.

It is listed for a great price and if we had the money to restore her properly she'd be sold right now.
Frank wanted to move here because there is an amazing bakery across the street.  Their Tarts are to die for!  Her's the link to their blog - The Little Tart

Here is another one that is listed right now ...

It's a great space, check out some of the interior photos
Love the high ceilings and wood trim
This is the added Studio space that I would LOVE to call my own!

I'm also following a blog of a couple who are renovating their School House - check it out!
Woodside School Blog

If you are on Pinterest and love School Houses come on over and follow.
Pinterest School House Board

Friday, April 20, 2012

Versatile Blogger Award

Thanks to Barb from Turtles and Tails for nominating me for a Versatile Blogger award.


I really appreciate the nomination and the motivation since I haven't blogged in over a month.  I've been a lacking in motivation lately and I hate admitting it.
Thanks Barb!  Barb and I know each other outside of the Blog world, we work together.  I have really enjoyed getting to know another side of Barb through her blog.  She is creative, talented and funny!  I love her writing style.  Without a doubt my favourite posts of Barb's include her fur babies Chloe and Sasha.

I'm nominating ...

Proper Prim - I love Deb's posts about her grand daughter Mya
Apple Box Boutique - Annie Sloan Chalk Paint Stockist
Aqua Seventy 6 - Check out Yvette's Etsy shop
Cherry Street Cottage - Jessica is going to be a Mom soon, I love her Bernese Mountain Dogs!
Serendipitous Home - I am in love with Sandra's home and style

Ok 7 things about me ...
  1. I taught disco dancing at a health club when I was 18.
  2. When I was in high school I had a ski membership at Horseshoe Valley resort, every weekend I would get up at dark-thirty to catch the first bus in front of my house and take it to the local subway station where I would catch a grey hound bus and take it to the resort, just so I could ski.  I would do this both Saturday and Sunday every weekend of the winter.
  3. I had a summer job working at a Baldwin Piano store in Scarborough.  I was filling in for Lawrence Gowan who was taking time off to tour with his first band,  Rhinegold.  No, I never  met him in person. 
  4. In 1997 my girlfriend Cyndi and I were asked to join a Bar Pool League in Mississauga, the team that recruited us needed "beginners".  We were told there was a good chance we could go to Vegas for free.  Our team won the local finals 2 years in a row so we went to the Vegas tournament.  What a great time!  If I remember correctly the 2nd year in Vegas we were voted friendliest team ... kinda like Miss Congeniality.
  5. I might regret sharing this one, my dad's nick name for me when I was little was Dopey Jopey. I was a very naive little girl and a little unsure of myself (maybe it was those round pink glasses they made me wear).   I shared this nick name with my friend Cyndi after a few cocktails once and she has called me DJ ever since.
  6. I went to a special high school for Vocational Arts, it was 2 credits in grades 9 and 10 and 4 credits for 11 and 12.  I didn't continue with the program for grades 11 and 12 since I really wasn't sure if I wanted a career in the Arts. 
  7. I was very athletic and competitive when I was younger.  I was a figure skater when I was in school, I even went back to it in 97 when I joined an adult Precision Skating Team.  I also played in a lot of racquet ball tournaments in the 80's, my mother was my doubles partner.
Thanks Barb from Turtles and Tails again for nominating me.

If you were nominated for the Versatile Blogger Award, here are the rules:

  1. Thank the person that gave you the award in a blog post.
  2. Include a link to their blog.
  3. Pass the award on to 5 bloggers you follow. (it was 15 but I reduced it to 5 to take a little less time)
  4. Include 7 random things about yourself in your post.
  5. Notify your nominees by leaving a comment on their blog.

Sunday, February 26, 2012

Coca-Cola End Table

I threw this together with a few things we had around the house

Isn't she cute?

This project started when I was deciding where to store the metal tub that I'd purchased to put our Christmas Tree in.

I had this piece of glass on an old wobbly table that I put outside on the deck.  The base is garbage but I just couldn't bring myself to throw both the base and glass out.


I cleaned the glass and checked it on the top of the of the tub to see the fit and make sure it wasn't  going to wobble ... I hate glass that wobbles!

Here's the tub prior to adding the logo.

I found a Coco-Cola Logo online and imported into my Silhouette Design software.
Then I cut a stencil with my Silhouette Cameo (I love my Silhouette!).

I just used some white acrylic craft paint to paint out the logo.

The table needed to be higher, we were going to add legs but in my haste to get something finished I started hunting around the house and found an aged metal tray with legs that I could never find a good use for.  I added a cut up 2 x 4 on top of the tray to lift the tub just a hint more.  Done!

Posting to


Home Stories A to Z